Canva Guide and 40+ Canva Tips
Canva has been wowing us ever since it was launched in 2012 by co-founders Cameron Adams, Cliff Obrecht, and Melanie Perkins.
With its user-friendly platform and powerful features, it’s no surprise that Canva has become one of the most popular tools when it comes to designing visual content.
As an online business owner, I’m a huge fan of Canva because it helps me quickly create stunning visuals in multiple formats. Instead of always starting from scratch, I can simply create templates for my business and use them to get things done faster and with more ease. (The templates in our shop are based on actual templates we’ve used ourselves!)
There’s just so many things you can create and do with Canva. I’ve used it for lead magnets, eBooks, online course materials, website graphics, social media graphics, and even client guides to enhance my clients’ experience while working with me.
This is all to say that I was excited when Canva reached out to me to publish a blog post a few weeks ago. I know firsthand that Canva is not only a powerful design platform, it’s also an incredibly helpful productivity tool that could save you a whole lot of time and energy in getting amazing visuals out there for your business.
Ready to learn how to get the best out of Canva? In this article we dive into how to use Canva in 2021 plus 40+ Canva tips but first, here’s an overview for those who aren’t familiar with this platform.
What is Canva?
Canva is a user-friendly graphic design platform that helps you create stunning designs in different formats.
You can access and use Canva via its website (www.canva.com) or mobile app but they also have it available as a desktop download.
Canva Free vs. Canva Pro
One of the best things about Canva is that they offer both a free version and a paid version called Canva Pro.
I recommend checking out the Canva free version first to test out all the basic features of the platform. Then if you think you need to do more or if you’re looking to use Canva for your business, you can try out Canva Pro with a free 30-day trial and then upgrade starting at $9.99 per month for annual billing.
Compared to the free version, Canva Pro includes more fonts, stock photos, and templates for you to choose from. It includes 100GB of cloud storage compared to 5GB for the free version. You’ll also have access to several more advanced features such as background remover, Brand Kit, and Magic Resize (more on these later).
Then for those who need all the features of Canva Pro but are part of large teams or organizations, you may want to look into Canva for Enterprise which offers unlimited storage and even more advanced controls for collaborating and designing at scale.
It’s also worth noting that the platform is being offered free for nonprofits (Canva for Nonprofits) and registered classrooms (Canva for Education) so be sure to check those out to see if you qualify.
Check out Canva’s pricing plans here.
1. Create Different Design Formats
As I mentioned earlier, you can use Canva to create different designs in a wide range of formats.
Some popular options include social media graphics, brochures, resumes, presentations, and flyers but click here to see the complete list of formats.
What’s great about that page is if you click on any format there, you’ll be directed to that format’s resource page which includes tips and resources.
For example, if you’d like to create Instagram posts or Stories, you can click here to learn about Instagram’s recommended sizes and get some inspiration if you’re running out of content ideas.
2. Choose From Multiple File Types
Once you’re finished creating or customizing a design in the Canva Editor, you can then choose to download your design in multiple file types.
For images or graphics, you can download it as a JPG or PNG file. (If you have Canva Pro, you can download PNGs with transparent backgrounds.)
For worksheets, flyers, brochures, and similar formats, you can download your work as a PDF Standard file or a PDF Print file if you want it in high quality or for printing.
There are also other file options such as MP4 video, GIFs, and SVG (this last one’s new and for Canva Pro users).
As a Canva Pro user, you can even download your file as a compressed file with lower quality. This is particularly helpful for creating designs that don’t need to be heavy or ultra hi-res like small website graphics or social media graphics.
3. Use Canva Images and Photo Editor
Canva allows you to upload your own images from your device but you can also take advantage of its millions of free and paid stock photographs.
You can then edit the photos from within the platform (yes, you read that right!) using preset filters such as “greyscale,” “retro,” “summer,” and many more.
You also have basic photo editing features like cropping and flipping as well as adjusting the brightness, contrast, saturation, tint, etc.
For Canva Pro users, you can also remove the background of an image with one click. Simply select the image then click on the Effects option from the toolbar and click on Background Remover.
If you’re in need of background photos specifically, Canva has a lot of those over on this page.
4. Use Canva Filter Codes
We mentioned using preset filters already but did you know that you can create custom filters too? This is helpful in editing multiple photos to all look similar and achieve brand consistency (hello, instantly curated Instagram feed!).
To create a custom filter code, add a photo to a blank canvas and tinker around the filter settings (click on Edit > Adjust).
Once you’re happy with the settings, copy the filter code at the bottom of the left side panel, click on the next photo you want to edit, and paste the code in Edit > Adjust > Filter code.
(Alternatively, you could also select the first photo, click on the “Copy style” icon on the top right side of the toolbar, and click on the second photo to paste the filter settings.)
5. Use Canva Shapes, Icons, Lines, Vectors, and Illustrations
If you’re looking to customize your designs even more, you can use Canva’s wide selection of shapes, icons, lines, vectors, and illustrations.
To access these elements from the Canva Editor, refer to your left sidebar menu and select the Elements tab.
You can then type a keyword to search for an element you want, scroll to see a list of featured elements, or view your “Recently used” elements from the top.
If you’re looking to add lines to your designs, creating lines of all sizes is now easier in Canva. You can adjust a line’s weight, style, color, and even the ends simply by dragging the endpoints. The keyboard shortcut to add a line is L.
It’s worth noting that Canva is always adding new items to their vast collection so be sure to check back regularly.
6. Use Canva Brand Codes
If brand consistency is important to you, you can search for elements that are similar and made by the same Canva designer using brand codes.
Find an element you like and click on the three dots icon on the top right corner. This will open up a small window with more information about the element such as the title of the element, name of the designer who created it, and its keywords.
Click on the “View more by [designer]” link and the search panel will show all the elements made by that designer.
Within the search box, there will be a code that starts with “brand:” followed by a bunch of numbers. You can then copy and take note of that brand code to refer to in the future.
7. Create Videos, Animations, and GIFs
Did you know that Canva allows you to create videos too?
You can upload your own videos and audio tracks from your device (refer to the left sidebar menu, under Uploads > Upload media) and then add it to your design.
Alternatively, you can choose from Canva’s large collection of stock videos and 25,000 royalty-free audio tracks (both free and paid options available).
Once you’ve added a video to your design, click on the video and a video toolbar will appear where you can crop, flip, or adjust the video length. You can also resize the video to fit the entire page, make it smaller, or drag it around.
If you’re looking to create GIFs or use animations and stickers, Canva has options for you too.
For animations, make sure you’re not selecting anything in the Canva Editor and the toolbar will show an “Animate” option. You can use this to adjust the length of the animation, choose between free and paid options, and even apply the animation to all pages of your design.
For stickers, type “animation stickers” in the search box of the Elements tab.
For GIFs, click to the Download button on the top right corner of your screen and select GIF as the file type.
8. Use Free Device Mockups
If you’re in need of device mockups to promote your lead magnet, online course, eBook, or other products and services, Canva’s got you covered!
Select Elements from your left sidebar menu and click on “See all” under the Frames category. There you’ll find mockup frames for a laptop, desktop, phone, and tablet. Click on the device to add it to your design and drag and drop a photo inside the frame. You can also customize the device’s colors.
9. Search and Filter Elements
Canva has a handy search function where you can type in keywords to search for an element you want.
To find even more specific elements, you combine search keywords by adding “+” before each keyword (ex. type “+green +leaves” to find green-colored leaves).
You can also filter the elements you’re searching for in Canva. In the Elements tab, refer to the search bar on top, type in a keyword, and click on the toggle icon.
Here you can filter your search by color, animation (Static or Animated), and by availability (Free or Pro) and then click “Apply filters.”
10. Filter Fonts Search
Choosing a font in Canva doesn’t have to be overwhelming. You can always filter search results by selecting a text box and referring to the font options’ search box. Here you can see fonts under different categories such as handwriting, corporate, display, sans serif, serif, calligraphy, and many more.
Enhance Your Presentations
Another amazing feature of Canva is that it allows you to easily create presentations and actually present it from the platform.
11. Present and Record
You can now record yourself actually presenting your presentation using Canva. Refer to the top right corner of your screen, select the three dots icon, and select “Present and record” instead of just “Present.” You can then share the link to others for viewing.
12. Present With Notes
You can add notes to your presentations (refer to the page settings icons on top of each slide and click on the “Add presenter notes” icon). Once you’ve added all of your notes to your slides, click on the 3 dots icon on the top right corner of your screen, and select the “Present with notes” option.
13. Use Graphs and Charts
Graphs and charts can make your presentation more visual and easier to understand for your viewers. Fortunately, you can add data to Canva and have it create a graph or chart for you automatically and you can quickly embed it in your presentations (or any design format actually!).
14. Share as a Fullscreen Website
You can also create your presentation in Canva and then share it as a fullscreen website. This is great if you are sending a presentation to a client but don’t want to share the actual editable file.
All you have to do is click on the 3 dots icon from the top right corner of your screen, select “Website” under the “Share” category and choose from the website styles available: Presentation, Scrolling, Classic Navigation, or Standard.
(It’s also important to note that you can share other design formats as a website, not just presentations.)
15. Go Live with Canva
Canva Live is a new feature that allows you to present and engage with your audience in real time. They’ll be able to submit questions and comments directly from their device while you, the presenter, can display questions on the screen for them.
To access this, while you’re in the Canva Editor, click on the “Present fullscreen” option (icon is located in the bottom right corner of your screen) and then click on the Canva Live icon (also on the bottom right corner). On the next page, click on “Start new session” and you’ll be given a code you can share with your audience. They’ll then need to go to canva.live and enter the code to join you.
16. Use the Canva Brand Kit
For Canva Pro users, you can build your own brand kit within the platform complete with your brand colors, fonts, and logo.
To access this, go to your account homepage and select the Brand Kit tab from the left sidebar menu. From there you can upload your brand logo, select your brand fonts, and add your color palettes.
17. Customize a Template to Match Your Brand
Using the Canva Brand Kit feature (again this is for Canva Pro users), you can easily pull your own branding elements (fonts and color palette) whenever you’re designing a new project.
All you have to do is refer to the Styles tab from the left sidebar menu and click on your color palette or fonts. Canva will then incorporate this into a template or to your design automatically. You can even click on “Apply to all pages” in order to, well, apply the design to all pages.
18. Change All Colors With One Click
Aside from the Brand Kit, another massive time-saver is Canva’s “Change all” feature.
If you’re looking to change a color of multiple elements in one design, you don’t have to go to each element on different pages and change the color one by one.
Select an element in the design (ex. a rectangle, icon, text, etc.) and a toolbar will appear where you can change the color.
Click on a new color for the element and then a checkbox option at the bottom of the side panel will appear which says "Change all..." You can then check this box to change all of the same-colored elements to the same new color with one click.
This is particularly helpful if you’ve purchased one of our templates and you want to quickly customize the entire template with your brand colors.
19. Create Your Logo
Creating a logo is made easier using Canva’s logo templates. They even offer tips on how to create and choose your logo elements so that it can become the best representation of your business.
Note: Use caution when using logo templates because you cannot trademark designs that use stock media.
20. Choose Your Colors
You can choose colors that truly represent your business using Canva’s color wheel and color meanings options. You can also use the color palette where you can use keywords to search for different color palettes or take an image and take a color palette from it using the color palette generator.
21. Choose Your Fonts
You’re free to express yourself and your business with hundreds of fonts available from Canva (both free and paid options available) but they also offer help in figuring out your ideal font combinations.
22. Choose a Trending Style
If you don’t have your own brand style just yet, don’t worry!
Go to the Styles tab on the left sidebar menu and scroll down to choose from Canva’s selection of trending styles which includes matching font combinations and color palettes.
Again, if you’re a Canva Pro user, you can select a trending style and apply it to all pages of a design with one click.
23. Use Text Effects
Here’s another new feature from Canva: you can now add text effects to enhance your designs. There are two ways to do this.
The first is to select a text box and click on “Effects” from the text toolbar. From there you can choose among the following text effect options: shadow, lift, hollow, splice, echo, glitch, neon, and curve (yes, curved text is now available!).
The second way is to click on the Text tab from your left sidebar menu and scroll down for some ready-made text effects you can choose from. Many are for Canva Pro users but there are still some available for free Canva version users such as the neon, retro, and halloween -themed options.
24. Use Magic Resize
For Canva Pro users, you can use the Magic Resize feature to resize a design to another format with one click. Simply click on Resize from the top menu and select a different format.
This is particularly helpful for repurposing social media content (ex. Instagram posts to Instagram Stories, Pinterest Pins, or Facebook posts) or converting documents from A4 paper size to US letter size and vice versa.
25. Use the Canva Paint Roller Tool
Canva now has this handy paint roller tool which you can use to copy-paste styles — no more changing a style of a text or photo one by one!
The paint roller icon is located on the top right side of the toolbar and to use it, all you have to do is click on an item and then click on the paint roller icon to copy the item’s style. Then you can go ahead and click on the item you want the style to be pasted to to paste the style.
26. Add a Clickable Link
It’s also worth noting that you can add a clickable link to an element so that the reader or viewer can click on the element and be directed to a website of your choosing.
This is particularly helpful for creating instructional or interactive PDFs like lead magnets, eBooks, or client guides.
To add a link to an element, click on an element and a toolbar will appear. Over on the right side of the toolbar, click on the link icon and type in your link.
27. Group Elements
You can also group more than one element together so that you can edit, move, or copy multiple items at once.
To group elements, select the elements using your cursor and click on Group from the top right side of the toolbar.
The keyboard shortcut for this is Command-G.
28. Use and Position Layers
For Adobe users, you must be very familiar with layers but in Canva, elements can also work in a similar way. You can think of each element as its own layer that you can move forward or backward and align to the left, center, right, top, middle, or bottom of the page.
To reposition an element as a layer, select the element and click on Position from the top right side of the toolbar. You can also right-click to choose among the available “actions” or use the keyboard shortcut Command + ] to move the element forward and Command + [ to move it backward.
29. Use Grids to Create Layouts
Canva also has this cool “grids” feature that you can use to quickly map out different layouts with proportional sizes.
For example, if you want to create an Instagram post with four boxes in a 2x2 format, just go to Elements from the left sidebar menu, scroll down to Grids, and click “See all.” Find the grid with the four boxes and click to add it to your design.
You can then do your thing and just delete the grid after if you don’t plan on using it.
30. Save to Folder
You can also create folders and save your designs to those folders to better organize your Canva account. To do this, go to File from the top menu and click on “Save to Folder.” You can then choose a folder you’ve already created or create a new one.
31. Collaborate as a Team
Canva offers free teams and Canva Pro teams with which you can invite people to jump in and collaborate together on any design. To create a team, refer to your Canva left sidebar menu from your account homepage.
32. See Version History
Version History is another new Canva Pro feature which allows you to see the list of changes made to a design. This is particularly helpful for those collaborating or commenting as a team but also if you’re a client working with a graphic designer. Go to File > Version history.
33. Print with Canva
Photo books, brochures, business cards, postcards, and even t-shirts — you can now take the designs you’ve made using Canva and get them printed out via printing companies Canva has partnered with. Note this feature is currently limited to selected regions but you can click here and here to learn more.
34. Use Integrated Apps
As I mentioned earlier, Canva is not only a powerful design platform, it’s also a helpful productivity tool. This is seen with its recent integration with various apps and tools we all know and love.
You can now connect Canva with your accounts in Google Drive, Dropbox, Typeform, Hubspot, Slack, various social media platforms, and many more to speed up your workflow. You can even publish your designs to other platforms directly.
New: Canva is actively adding more and more tools, apps, and integrations to their collection. Be sure to check out Smartmockups, Shadows, Frames, and Duotone.
35. Use Canva’s New Content Planner
You can now create and publish your content directly from the Canva Editor using Canva’s new Content Planner.
From your account homepage, refer to the left sidebar menu and select the Content Planner tab. You’ll then see a calendar where you can select a date and either create a design or choose a design to schedule.
If you click on “choose a design,” a list of your designs will appear and you can select one by scrolling or typing the title in the search box. You can then choose which platform to post it to and add a caption. Just make sure you’ve integrated your social media accounts prior to doing this (see previous Canva tip on app integrations).
More Canva Tips for Productivity
Here are more Canva tips to improve your productivity and workflow.
36. Collapse the Side Panel
In the Canva Editor, you can collapse the side panel to enjoy a bigger workspace. The keyboard shortcut is Command + /.
37. Use the Grid View
You can now see all of the pages of a design with a bird’s eye view using Grid View (formerly Page Manager) with the icon located on the bottom right corner of the Canva Editor, between the zoom option and present in fullscreen option.
38. Show Rulers, Margins, Etc.
You can opt to show rulers, margins, guides, and print bleed by selecting it from File on the top menu toolbar.
39. Access Actions Using Right Click
You can now right-click on an element and “actions” will appear such as copy, paste, delete, send to front, comment, group, and others.
40. Copy One Design to Another
You can also copy one design and paste it to a completely different design (even with a different size). All you have to do is use your cursor to select the area of the design you want to copy, click on Command-C to copy, and then go over to the other design you want to paste it to and click Command-V.
41. Add Notes
As mentioned earlier, you can add notes to your presentations but you can also add notes to other types of designs. This can help you make note of ideas related to certain pages or collaborate with others by asking them to comment on your designs.
42. Lock Elements in Place
You can lock elements in place so that you don’t accidentally move or delete them. This is particularly helpful if you’re designing something complicated or something with many layers. Simply click on an element and click on the padlock icon on the top right side of the toolbar.
43. Use Canva Keyboard Shortcuts:
Add a line: L
Add a text box: T
Bold text: Command-B
Italicize text: Command-I
Underline text: Command-U
Align to center: Command-Shift-C
Align to the left: Command-Shift-L
Use uppercase letters: Command-Shift-K
Copy style: Command-Option-C
Paste style: Command-Option-V
Deselect an element: Esc
Select all elements: Command-A
Delete an element: Delete
Duplicate an element: Command-D
Move an element in increments: select the element and click the arrows
Move an element in larger increments: select the element, hold Shift, and click the arrows
Bring element forward: Command + ]
Send element backward: Command + [
Send element to the very back: Option-Command-[
Bring element to the very front: Option-Command-]
Group elements: Command-G
Constrain proportions while resizing: select the element/s, hold Shift, and drag corners to resize
Zoom In: Command (+)
Zoom Out: Command (-)
Undo an Action: Command-Z
Redo an Action: Command-Shift-Z
Add a comment: Option-Command-M
Present in full screen mode: Option-Command-P
Exit from full screen mode: Esc
Collapse sidebar: Command + /
+ Related post: Read our full list of 70+ Canva Keyboard Shortcuts
44. Check Out Other Canva Resources
Last but not the least in this list of Canva tips, you can refer to Canva’s own website for a large selection of helpful resources.
Check out Canva’s blog and social media accounts for informative and engaging content on design, marketing, branding, and business.
Dive deep into Canva’s Design School and Teaching Materials for workshops, tutorials, and lessons on various topics.
Don’t know the correct sizes for different designs? Check out Canva’s design size guide.
Don’t know what to post or create? Click here for some ideas and inspiration.
Are you a PowerPoint user? Check out the article how to use Canva and PowerPoint to make presentations.
You can also get support from Canva and stay updated with what’s new with the platform.
Over to You
Canva is not just a powerful design platform, it’s also a helpful productivity tool. From speeding up your design workflow to elevating your brand visuals, be sure to refer to this 2021 Canva guide and list of 40+ Canva tips to fully make the most of this popular and user-friendly platform.
Share in the comments below: What designs have you created using this platform? What Canva tips are you interested in trying out soon?
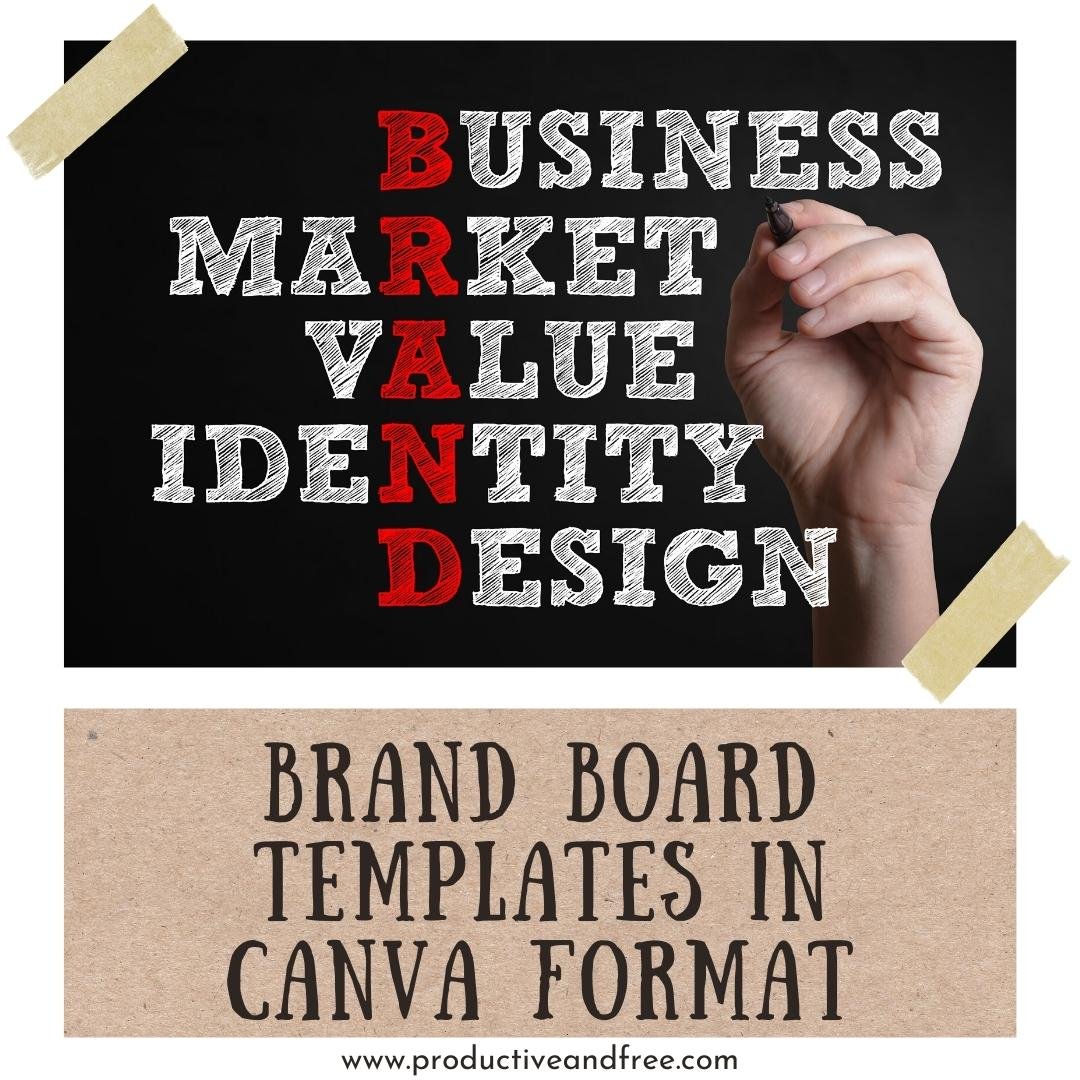
Grab our free brand board templates!
We have free brand board templates to help you hone in on your brand’s unique style and visual identity. It’s in Canva format so you can test out the platform for free and get access to our Canva video tutorial for more tips.


